click on images to enlarge them
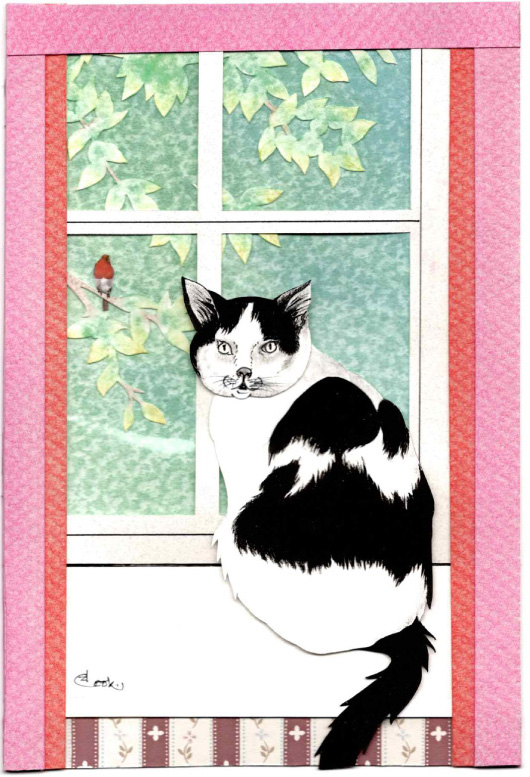
I was asked how I did the cat and robin layered papercut.
For this article I have simplified the stages, number of layers and individual pieces used.
From a master drawing, on A4 (60gm) tracing paper I traced guidelines to create a 10” x 7” image (inclusive of 1/2” bleed all around) to be cut down to a 9” x 6” finished image.
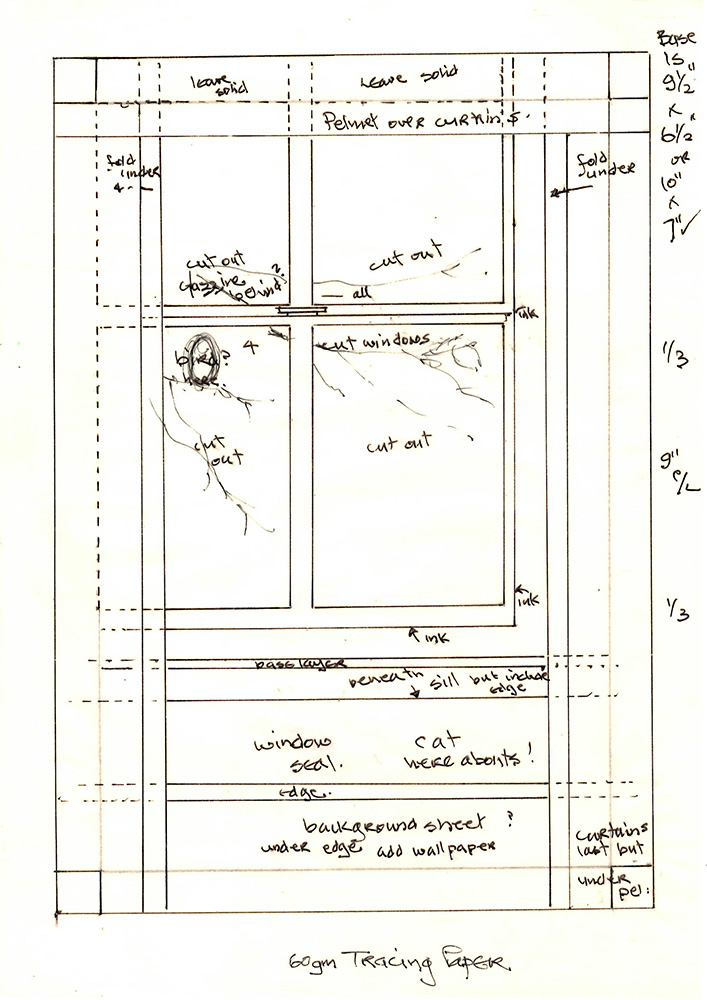
MY BASIC PATTERN.
1. BACKGROUND.
An A4 piece of knobbly-textured watercolour board (270gms) was used to accommodate the 9” x 6” image. Fine dust was scraped off a green and a blue pastel stick – NOT oil pastel – and rubbed in with kitchen towel. The more the dust is rubbed, the smoother, less streaky, the colour becomes. I darken by adding more dust or lighten gently with a soft or plastic eraser.
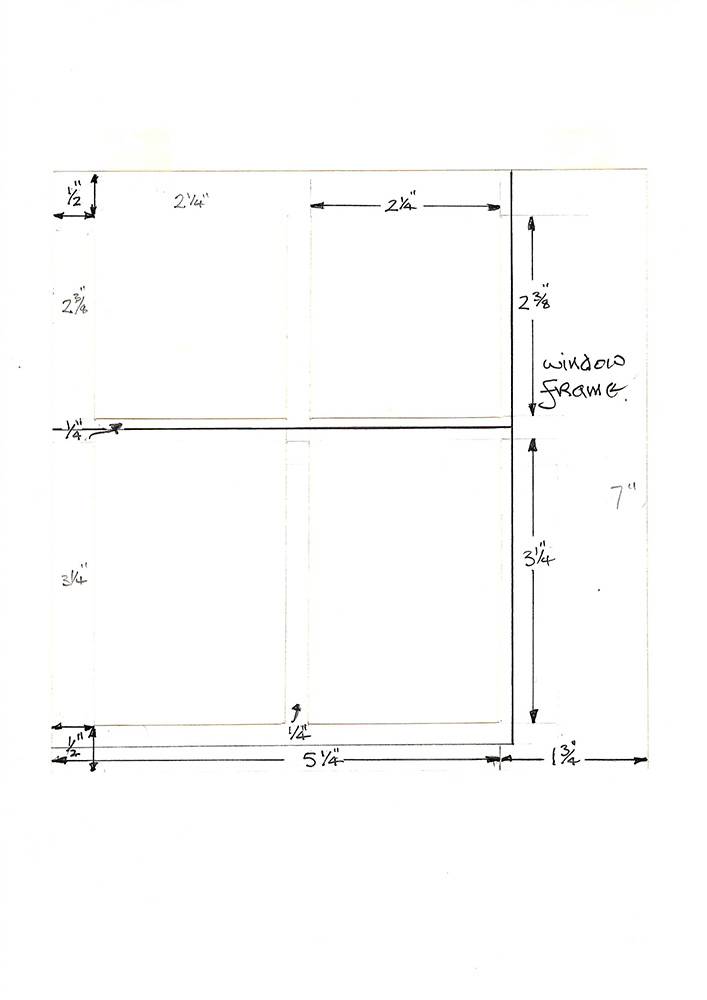
WINDOW FRAME.
2. WINDOW FRAME.
Using 100gm white paper – 7” square – the 4 glass panes were cut out. An ink pen divided the upper and lower portions and defined the right-hand border.
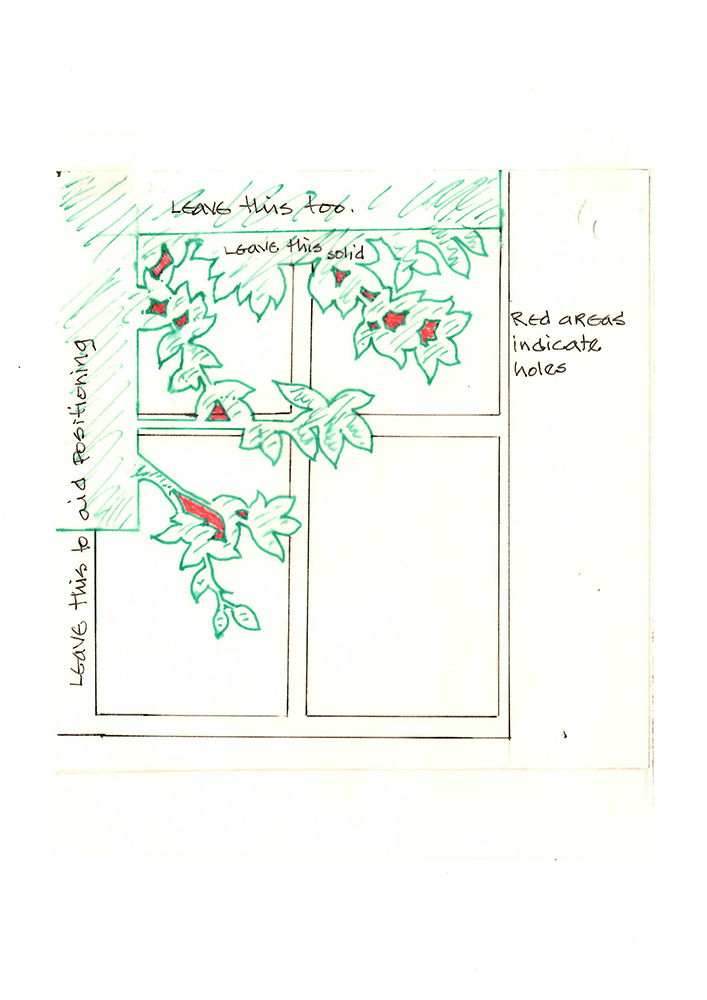
PATTERN FOR LEAVES.
3. THE LEAVES.
In one piece, the leaves were carefully cut out of 100gm paper with a scalpel. Coloured with yellow and light green, pastel dust was rubbed in with cotton buds. For deeper colour I stroked the cotton bud along the pastel stick and rubbed heavily on the ends of the leaves. To fix the position of the leaves behind the window frame, I used 112gm tracing paper to trace and indicate the upper and lower removed panes. Leaf pattern is shown in green. Red areas denote holes cut out.
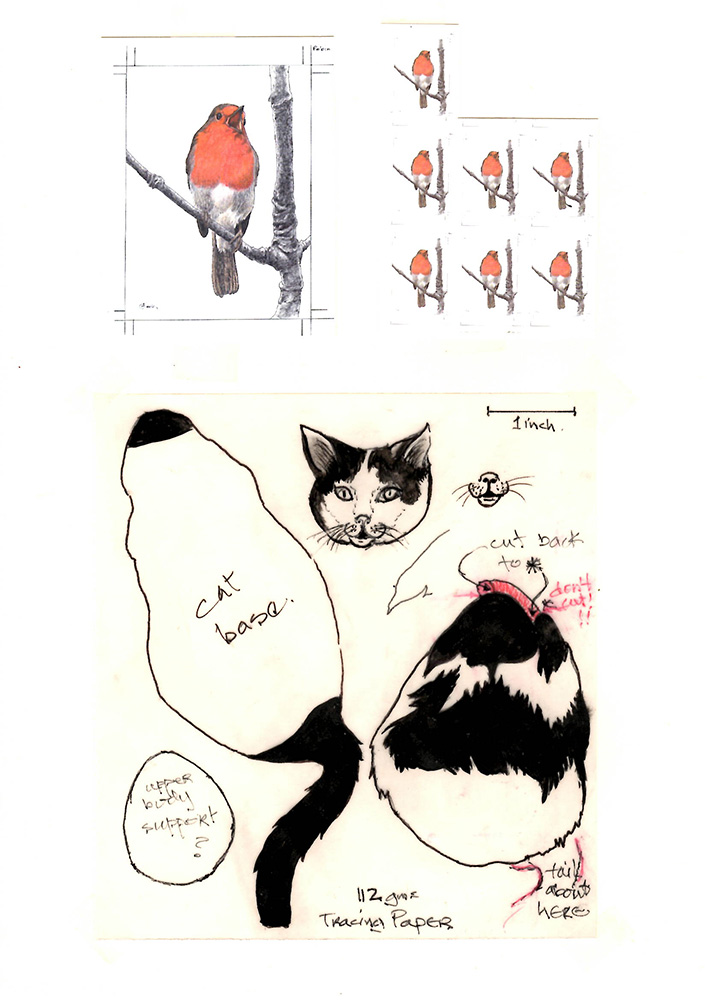
Robin & Cat
4. ROBIN.
The 5/8” robin was drastically reduced, in 2 stages, from a 51/2” original drawing of mine. Cut out (very fiddly!) and stuck behind the bough it sits on, with claws inked on the front of the bough. When all three of these parts were finished, the leaves and robin were glued behind the frame and then glued onto the background, using the first traced pattern to show its position.
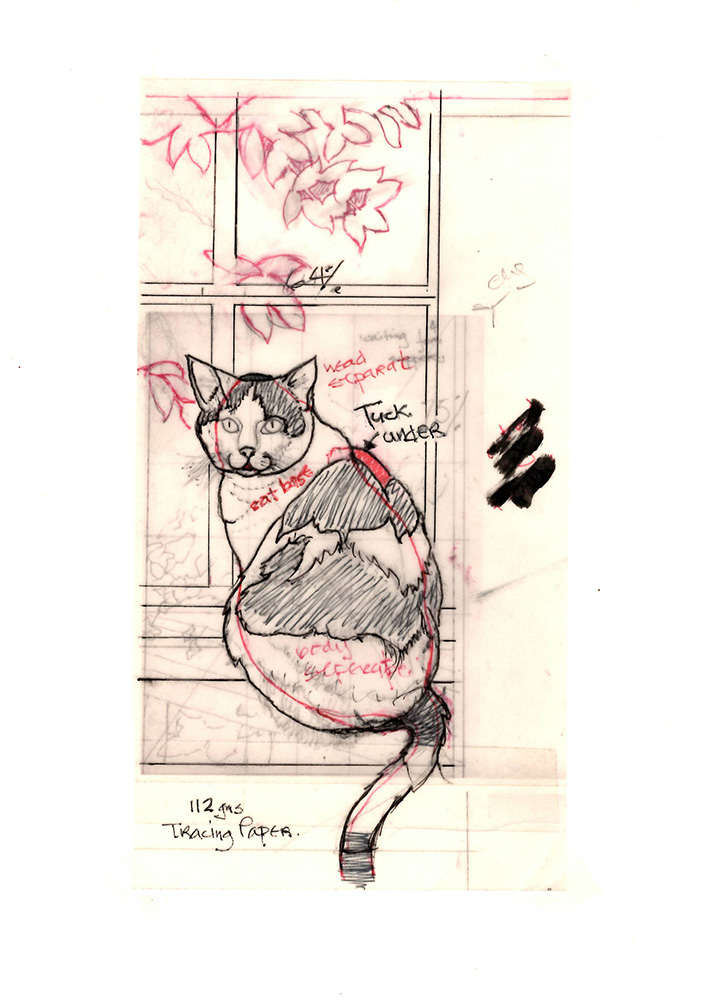
5. CAT.
The pattern for the cat is shown to the right, together with an upper body support. Made from 3 pieces I used a light box to lay this tracing on, and with heavyweight cartridge paper (220gms) laid over, I gently drew the shapes and markings, which I inked in before cutting out.
The face can be put on the body base at any angle, with a bit of the top black showing between the ears. The furry back is stuck on the body base too. A white area (shown red for clarity) is cut alongside the black left shoulder, to form a white right shoulder flap to glue under the cat base to hold its position. (See PDF 5 for how I placed it.) I put the complete cat aside and heavily inked under the window frame. I glued a piece of wallpaper to show under the windowsill.
6. WINDOWSILL.
I made this from pale tinted and spotted 100gm paper, wider (1 5/8”) than first planned. A 3/16” piece was cut to represent the edge, not obvious when scanned. Allowing a tiny gap of the black ink to show under the window frame, I glued the windowsill over the wallpaper.
7. CURTAINS and PELMET.
Using textured, off-cream paper (220gms), I cut 2 pieces (10” x 2 1/8”) and gently marked both at top and bottom 1”, 1/2” and 5/8”. I scored and folded down the 1” mark. I turned both over and scored down the 5/8” mark. Looking end on, the paper was Z-shaped. Using the same textured paper, the pelmet was cut 7” x 1” long.
Opening the 2 curtain shapes, I coloured the 5/8” areas only, in a heavily applied red pastel dust, rubbing it in to give a patterned effect. Before sticking both the 1” sides down on the red, I slid in a spare piece of paper to protect the red and covered the wider sides in pale mauve pastel dust, rubbing it in vigorously, to achieve the same patterned effect. Spare paper removed, the mauve was stuck down over the red. The pelmet was coloured the same way. Each curtain was stuck down from the 10” side edges. The pelmet was stuck down over the curtains from the top 7” edge. The curtained window was placed on clean paper, another clean sheet placed over it and under 2 heavy books.
 8. COMPLETION.
Using the image to the left as a guide, I glued the cat, with its upper body support on the back, to the window frame and sill. Finally, I trimmed 1/2” off all around to give the 9” x 6” picture. There is no need to do so if the artwork is to be framed.
Final word: to enhance the glass appearance, I put a thin sheet of cellophane between the window frame and leaves. When scanned, it gave a flare mark in the lower left panel. So, leave it out, it was not a good idea!
*** FINIS ***
David Cook